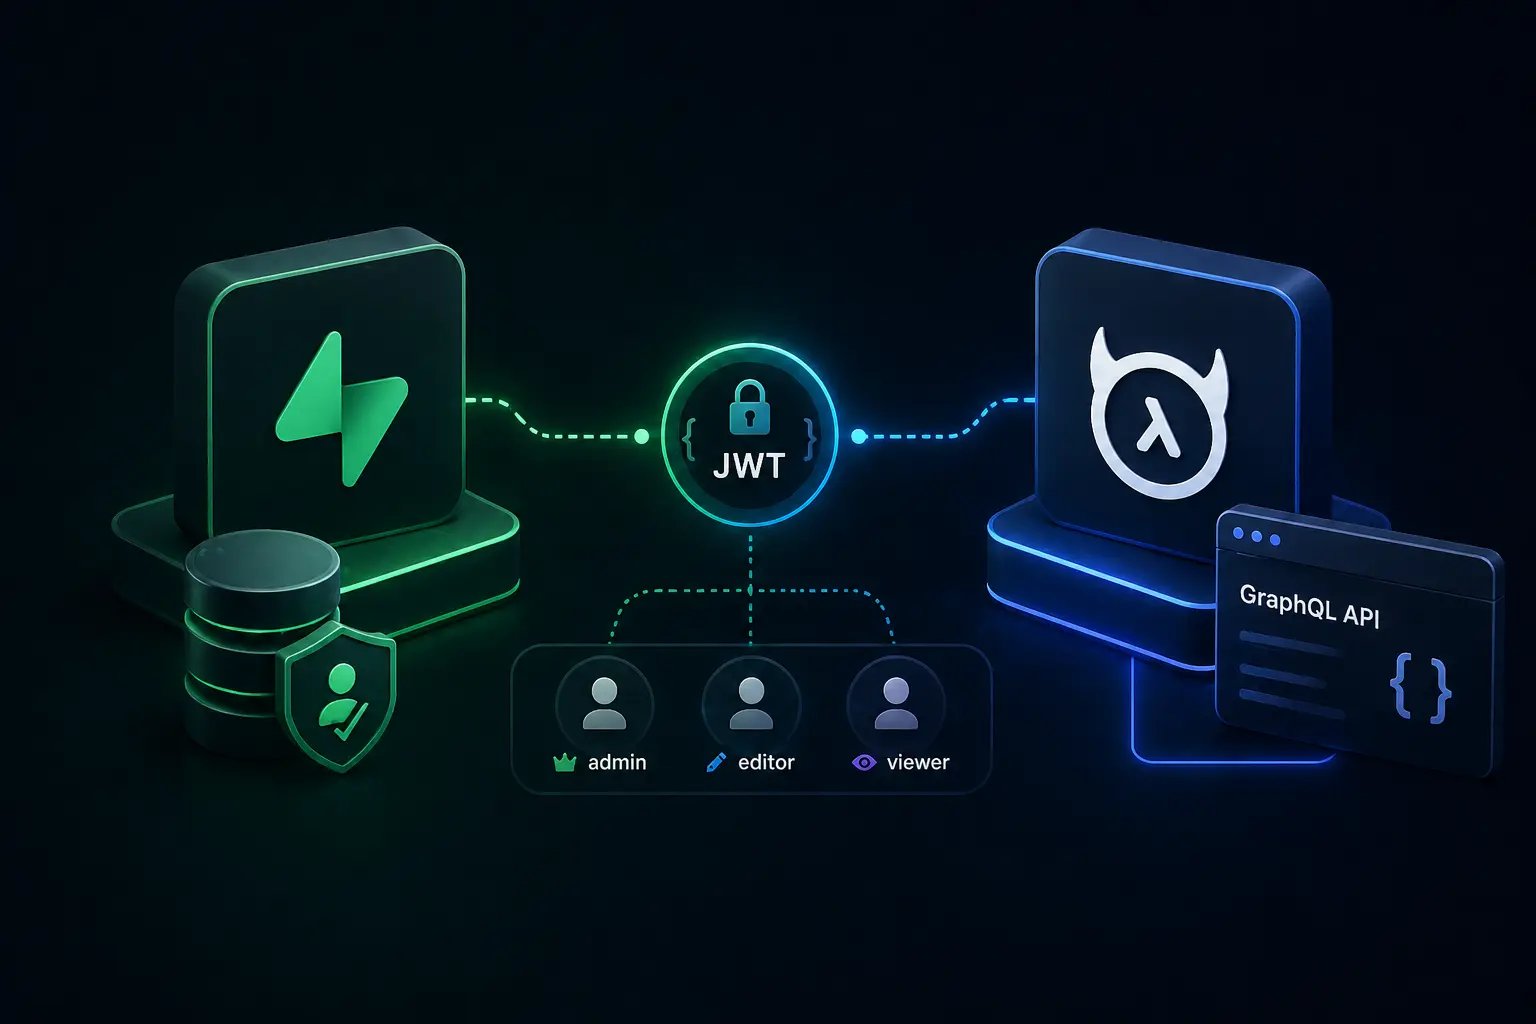



Supabase can issue JWTs for your users. Hasura can enforce GraphQL permissions from claims inside those tokens. This post wires the two together: a Supabase custom access token hook that injects Hasura claims, then Hasura JWT config that reads those roles.
Why this pairing
- Supabase handles sign-in and the Postgres user store.
- Hasura enforces row and field access from
x-hasura-*claims on the JWT. - Your app keeps one auth path instead of maintaining a second user system for GraphQL.
Prerequisites
- A Supabase project with Auth enabled.
- A Hasura instance (Cloud or self-hosted).
Create projects in the Supabase Dashboard and Hasura Cloud if you do not have them yet.
Step 1: Add Custom Claims via Database Function
Supabase allows you to embed custom claims in JWTs using data from the raw_app_meta_data field in user profiles, via a Custom Access Token hook (Auth). We'll create a database function and trigger to automatically inject Hasura-specific claims (like user ID and roles) into the token whenever a user logs in or updates their profile.
Why is this important? Hasura uses these claims to identify users and enforce role-based permissions, ensuring that each user only accesses data they're authorized to see.
In your Supabase Dashboard, navigate to the SQL Editor and create the following function:
-- Function to add Hasura claims to user metadata
CREATE OR REPLACE FUNCTION public.custom_access_token_hook(event jsonb)
RETURNS jsonb
LANGUAGE plpgsql
AS $$
DECLARE
  claims jsonb;
  user_role text;
BEGIN
  -- Get user role from raw_user_meta_data or default to 'user'
  user_role := COALESCE(
    event->'claims'->'app_metadata'->>'user_role',
    'user'
  );

  -- Build Hasura claims
  claims := jsonb_build_object(
    'https://hasura.io/jwt/claims', jsonb_build_object(
      'x-hasura-user-id', (event->'claims'->>'sub'),
      'x-hasura-default-role', user_role,
      'x-hasura-allowed-roles', jsonb_build_array(user_role, 'anonymous')
    )
  );

  -- Merge with existing claims
  event := jsonb_set(event, '{claims}', (event->'claims') || claims);

  RETURN event;
END;
$$;

-- Grant necessary permissions
GRANT USAGE ON SCHEMA public TO supabase_auth_admin;
GRANT EXECUTE ON FUNCTION public.custom_access_token_hook TO supabase_auth_admin;
REVOKE EXECUTE ON FUNCTION public.custom_access_token_hook FROM authenticated, anon, public;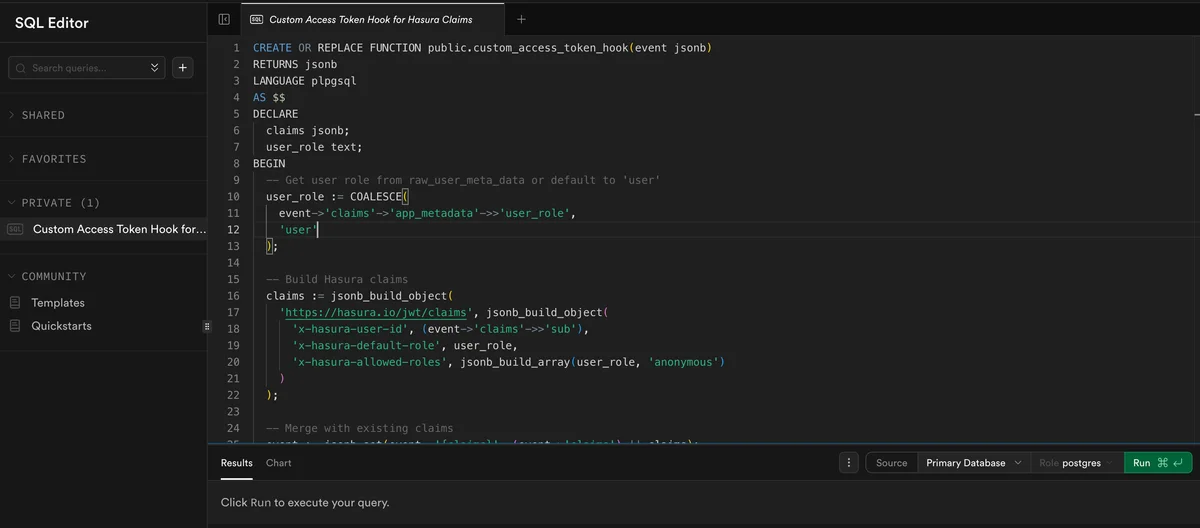
Note: Ensure the function name custom_access_token_hook matches exactly as shown, as Supabase looks for this specific name when enabling hooks.
Step 2: Enable the Hook in Supabase Dashboard
Now that the function is created, you need to activate it as a hook in Supabase to modify JWTs during user authentication.
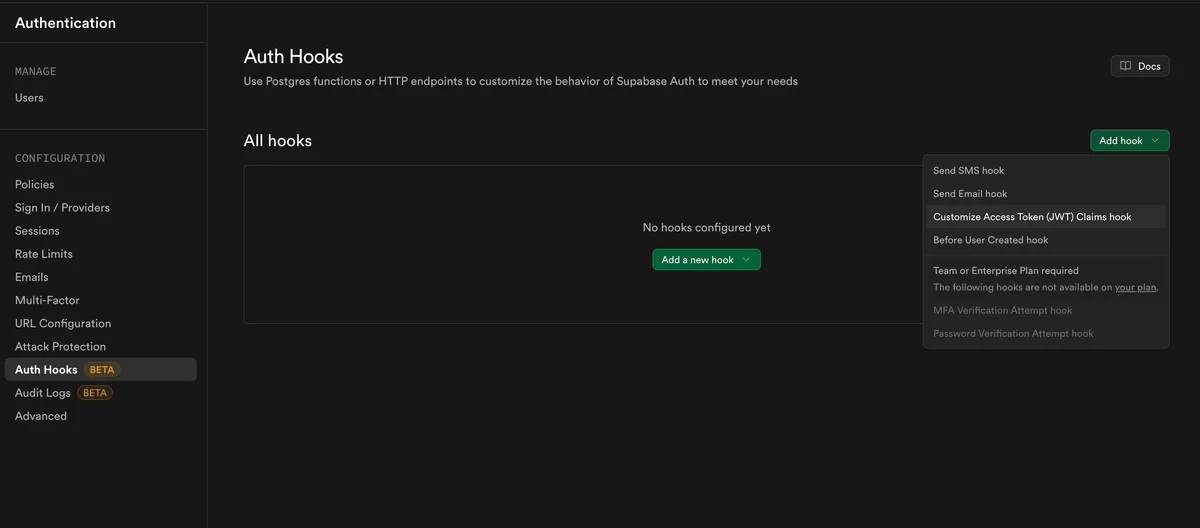
- Navigate to Authentication → Auth Hooks → Add Hook → Customize Access Token (JWT) Claims Hook.
- Enable the hook and select the SQL function
public.custom_access_token_hookfrom the dropdown.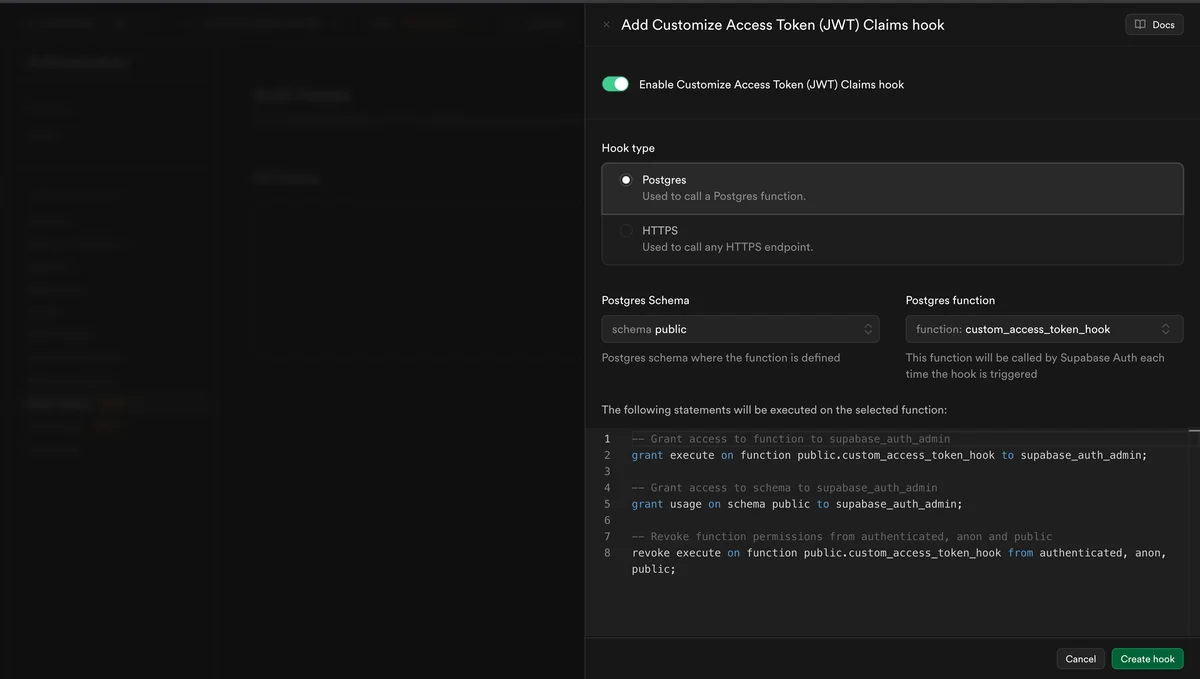
- Save your changes and verify that the hook is enabled.
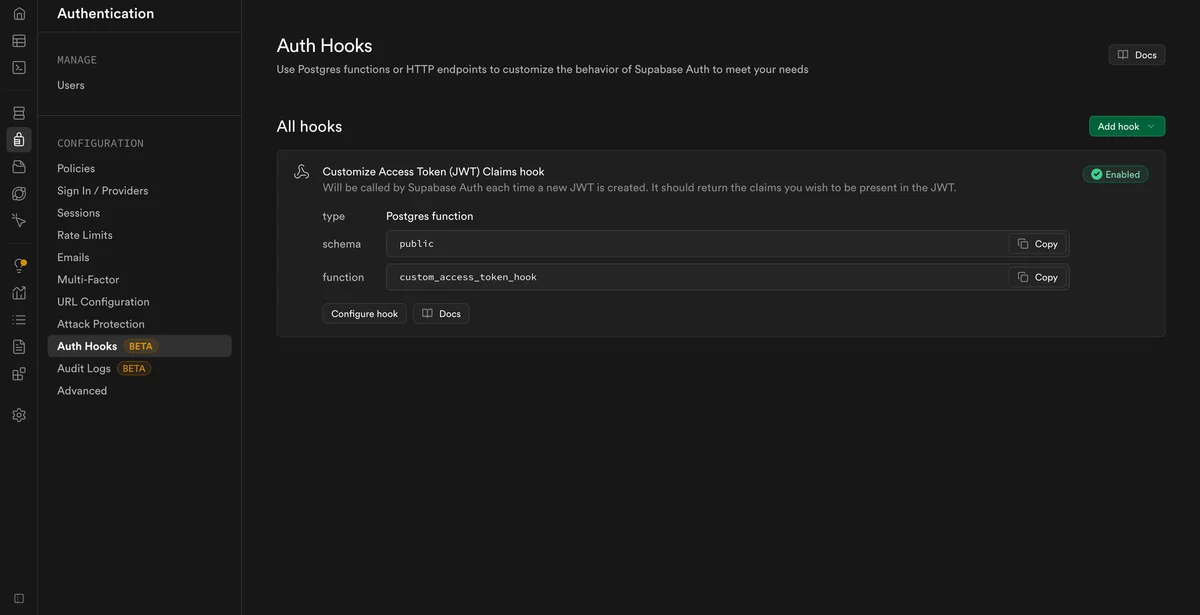
This step ensures that every time a user authenticates, the hook runs and embeds the Hasura claims into their JWT.
Step 3: Retrieve Supabase JWT Secret
Hasura needs the Supabase JWT secret to validate the tokens issued by Supabase. This secret is used to sign the JWTs and must be shared with Hasura for secure communication.
- In your Supabase Dashboard, go to Project Settings → JWT Keys.
- Copy the Legacy JWT Secret. Keep this secure and do not expose it in public repositories.
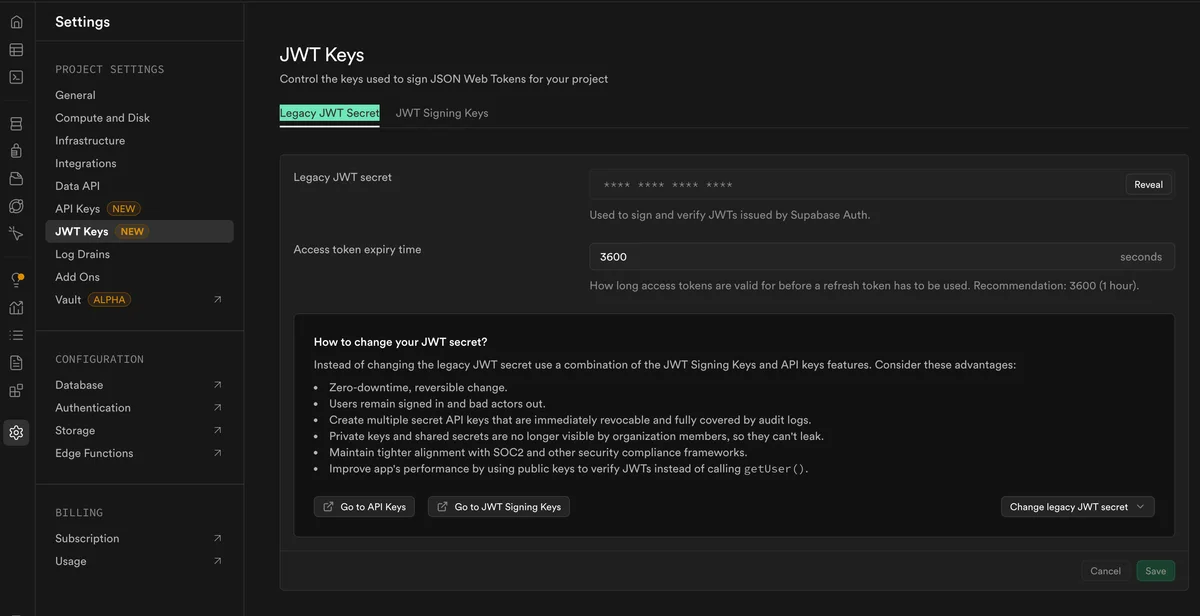
Warning: If this secret is compromised, unauthorized parties could forge tokens. Treat it like a password.
Step 4: Configure Hasura
With the JWT secret in hand, configure Hasura to recognize and validate Supabase-issued tokens. The setup differs slightly depending on whether you're using Hasura Cloud or a self-hosted instance.
4.1 Hasura Cloud
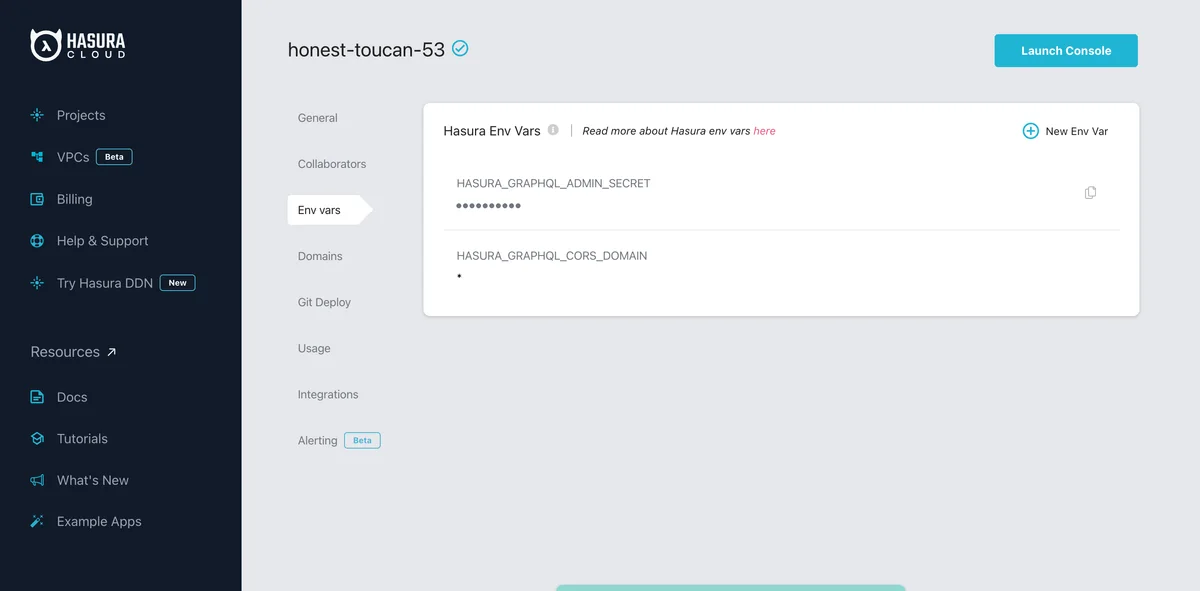
- Log in to your Hasura Cloud Dashboard and select your project.
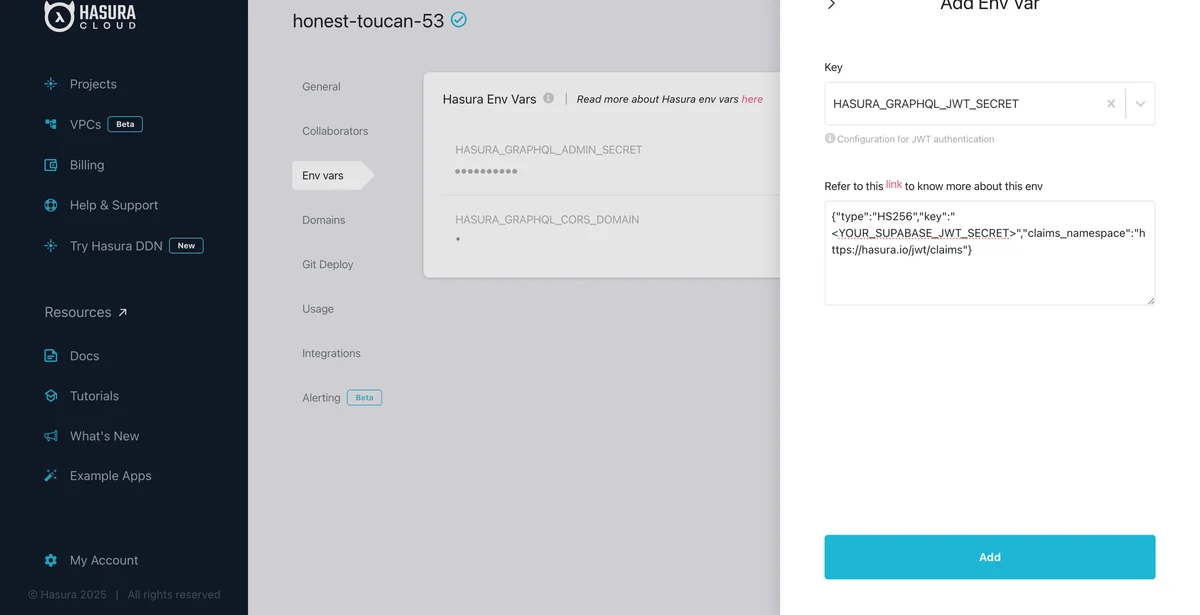
- Go to Env Vars and add a new environment variable named
HASURA_GRAPHQL_JWT_SECRET. - Set its value to
{"type":"HS256","key":"YOUR_SUPABASE_JWT_SECRET","claims_namespace":"https://hasura.io/jwt/claims"}. Replace YOUR_SUPABASE_JWT_SECRET with the secret you copied earlier. - Save the changes.
4.2 Self-Hosted Hasura
If you're running Hasura locally or on your own server, update your docker-compose.yml file:
hasura:
  environment:
    # other settings...
    HASURA_GRAPHQL_JWT_SECRET: '{"type":"HS256","key":"YOUR_SUPABASE_JWT_SECRET","claims_namespace":"https://hasura.io/jwt/claims"}'
Replace YOUR_SUPABASE_JWT_SECRET with your actual Supabase JWT secret, then restart the Hasura container to apply the changes.
Step 5: Verify Hasura Claims in Supabase Access Tokens
Let's confirm that the Hasura claims are correctly embedded in the Supabase JWTs.
- In your Supabase-integrated application, log in as a user to generate an access token.
- Extract the
access_tokenfrom the session object. - Paste it into jwt.io to decode and inspect the token. You should see the Hasura claims under the namespace
https://hasura.io/jwt/claims:
{
  ...,
  "https://hasura.io/jwt/claims": {
    "x-hasura-allowed-roles": [
      "user",
      "anonymous"
    ],
    "x-hasura-default-role": "user",
    "x-hasura-user-id": "USER_UUID_PLACEHOLDER"
  }
}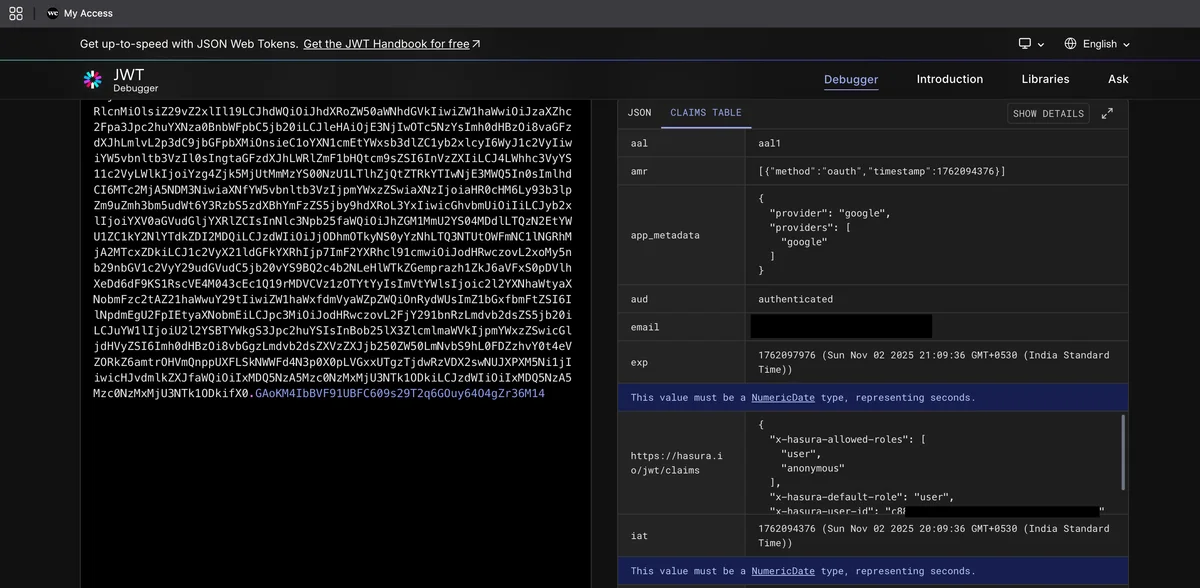
If you see these claims, congratulations! Your tokens are now carrying the necessary information for Hasura to enforce RBAC.
Step 6: Set Up Hasura RBAC Permissions
With the claims in place, it's time to define permissions in Hasura based on the roles (user and anonymous) embedded in the JWT.
- In the Hasura Console, navigate to the Data tab and select a table you want to secure.
- Go to the Permissions tab and define rules for each role. For example:
anonymous: Allow only read access to public data.user: Allow read and write access, restricted to data linked tox-hasura-user-id.
- Save the permissions.
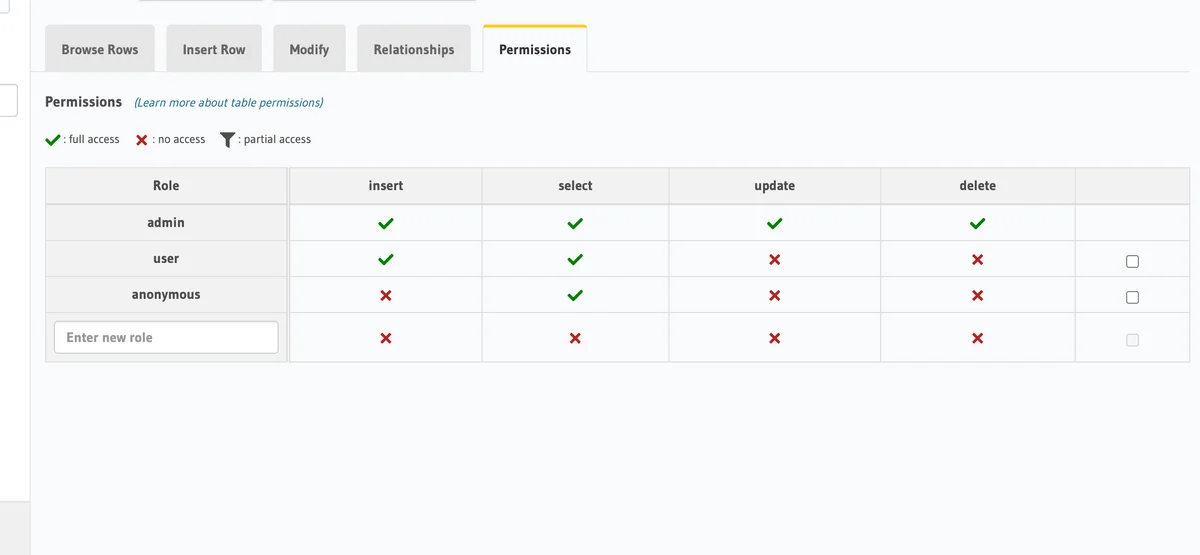
Tip: Use session variables like x-hasura-user-id in permission rules to create row-level security, ensuring users only access their own data.
Testing Your Integration
Beyond decoding the JWT, test the integration end-to-end to ensure everything works as expected:
- Log in to your application with a test user account.
- Use a GraphQL client (or Hasura's API Explorer) to query data, passing the Supabase
access_tokenas theAuthorization: Bearerheader with your access token value. - Verify that Hasura respects the roles and permissions. For instance, an
anonymoususer should be denied write access if configured as such.
If the query returns the expected data or an appropriate error based on permissions, your setup is working!
Troubleshooting Common Issues
If you encounter problems, here are some common issues and solutions:
- JWT Claims Not Appearing: Ensure the Supabase hook is enabled and the function name matches
custom_access_token_hook. Check for errors in the Supabase SQL Editor logs. - Hasura Rejects Tokens: Verify that the
HASURA_GRAPHQL_JWT_SECRETis correctly set with the right Supabase secret and that theclaims_namespacematcheshttps://hasura.io/jwt/claims. - Permission Errors: Double-check role names in Hasura match those in the JWT (
user,anonymous). Also, ensure permission rules are saved and applied to the correct tables.
If issues persist, consult Hasura: JWT mode, the Supabase Custom Access Token hook docs, or Supabase Support.
These examples illustrate how flexible and powerful this setup can be for modern applications.
Conclusion and Next Steps
Congratulations on successfully integrating Hasura RBAC with Supabase JWT Authentication! You've built a secure foundation for your application, leveraging the strengths of both platforms. For reference, the moving parts are documented here: Hasura JWT authentication, Supabase Custom Access Token hook, and Supabase JWTs overview.
Now, take it further:
- Experiment with more complex permission rules in Hasura to fine-tune access control.
- Explore Supabase Row-Level Security (RLS) for additional database-level protection.
- Share your experience or ask questions in the Hasura Community or Supabase Discord.
Thank you for following along! If you found this guide helpful, consider sharing it with others embarking on a similar journey. Happy coding!
You can find the complete blog post in my hasura-supabase-jwt-integration github repository.